Installing Wall Paneling: Entryway Design
"Updating the Home Entryway with some paneling fun!"
I believe that most people judge a home by it's entryway, so I figured why not add some flair to my entryway wall and add some wall paneling. I always love adding wall paneling to rooms because its the easiest and one of the cheapest ways to update a space.
"There are some affiliate links in this post, meaning I get a small commission if you purchase through these links, at no cost to you. Click Here to read my full disclosure."
Materiels
- 1x2x8 Select Pine Boards
- Wood Filler
- Caulk
- Scotch Painters Tape
- Paneling Adhesive
- Benjamin Moore - Swiss Coffee (75% Strength - Matte)
- Brad Nailer
- Brad Nails
- Level
- Miter Saw
The Before
First, let's take a look at the before! Not too shabby, but I knew adding the paneling would only elevate this space even more.
 I decided to go with a more simplistic approach because I didn't want to overwhelm people when they walked in, but it didn't take much to make this space pop.
Step 1: Mapping out the Design
The first thing I did was map out my design. I am a visual person, so I always like to use scotch painters tape to visualize my design first. This allows me to make design changes before actually having to commit to them.
 I had two different designs in my head, but ultimately I settled on the more complicated design, and thanks to the tape, I felt confident going into my project that I had made the right choice.

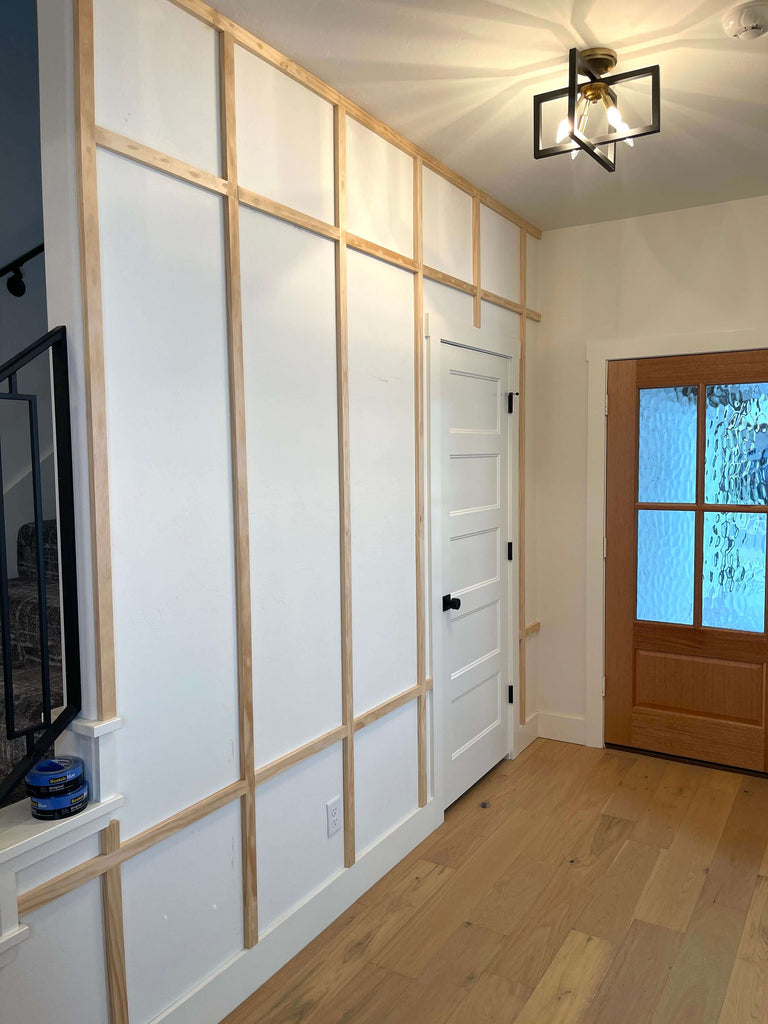
Step 2: Adding the Wall Paneling
Now that the design is all mapped out, one by one I started added the trim where I had taped. I removed the tape where the board should go and then I used my brad nailer and 2" brad nails to attach my paneling to the wall. I opted not to use adhesive this go round because Im pretty sure I'm going to end up changing the design in a few years.
 I went through and installed the vertical trim first, and then started to install the horizontal trim. I cut my trim down with my miter saw for nice clean cuts. I did not use adhesive for the majority of this project, except for one piece to ensure it was flush. Mainly, because I may change up this design in the future and it will be easier to remove.
I used a level to ensure the wood prices were secured evenly.
Step 3: Prepping and Painting
With the paneling installed, it was time to prep the wall. First I went through and filled in all of the nail holes and openings where the boards meet with wood filler, then I went back and used caulk to fill in all of the gaps between the trim and the wall. This ensures a seamless look at the end.  I painted about two/three coats on the paneling once it was ready, using both a roller and paint brush. Once the coats were on, it was finished! This small project definitely elevated this space and I'm so happy with how it turned out!
 The one other thing I really love is the table that I built. It was the first project I made for my new house and I love that it's the first thing everyone can see. Check out the details here on how I built this table!
Frequently Asked Questions
If you want to see the video process of me installing this wall, head on over to my Instagram and check out my "Entryway" Highlight! I had a ton of questions about the install so I figured I'd answer some of the frequent questions here!
Did you nail them into studs or not neccesary?
Typically wall paneling projects such as this one do not require you to utilize the studs. The brad nails or adhesive should be enough to hold the weight of the trim boards.
When you measure your pieces, do you cut exact or leave a little extra to tap in?
I typically try to leave a little extra because wood expands over time.
How did you make the vertical pieces extend to the baseboard?
The boards weren't long enough to span the size of the wall so I cut additional smaller pieces and butted them up against each other to create the illusion of one board.
Will you have to putty fill all the holes?
I always fill all nail holes I create, otherwise they will be seen.
Are your walls textured?
Yes my walls are textured and this project worked out just fine.
Can this type of project be done in a rental?
I probably wouldn't do this type of project in a rental without permission, but I have seen this done using command strips, to make it less permanent.
Well enough talk, let's get to the good stuff, the sources!
Before you head out, here's one last before and after!

and as always, thanks for reading guys! XOXO Ashley