Projects

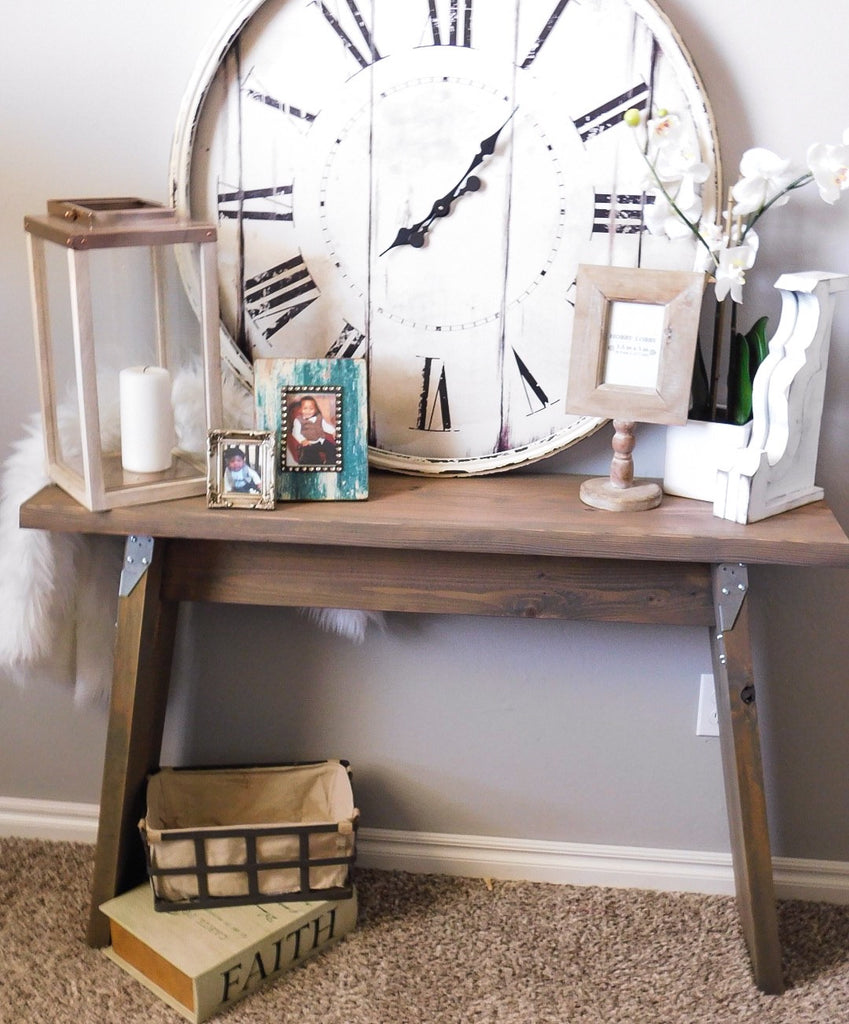
DIY Hairpin Coffee Table with Stenciled Tile
Don't let this DIY Hairpin Coffee Table fool ya, that's a stencil design!
I have seen DIY hairpin legs start to make themselves known and I thought this project would be a great way to dive into a new trend. So I made this DIY hairpin coffee table featuring a tile stencil on top!
Luckily for you guys, I videoed the process! Check it out and be sure to read up on all the details I missed in the video below.
There are some affiliate links in this post, meaning I get a small commission if you purchase through these links, at no cost to you. Click Here to read my full disclosure.
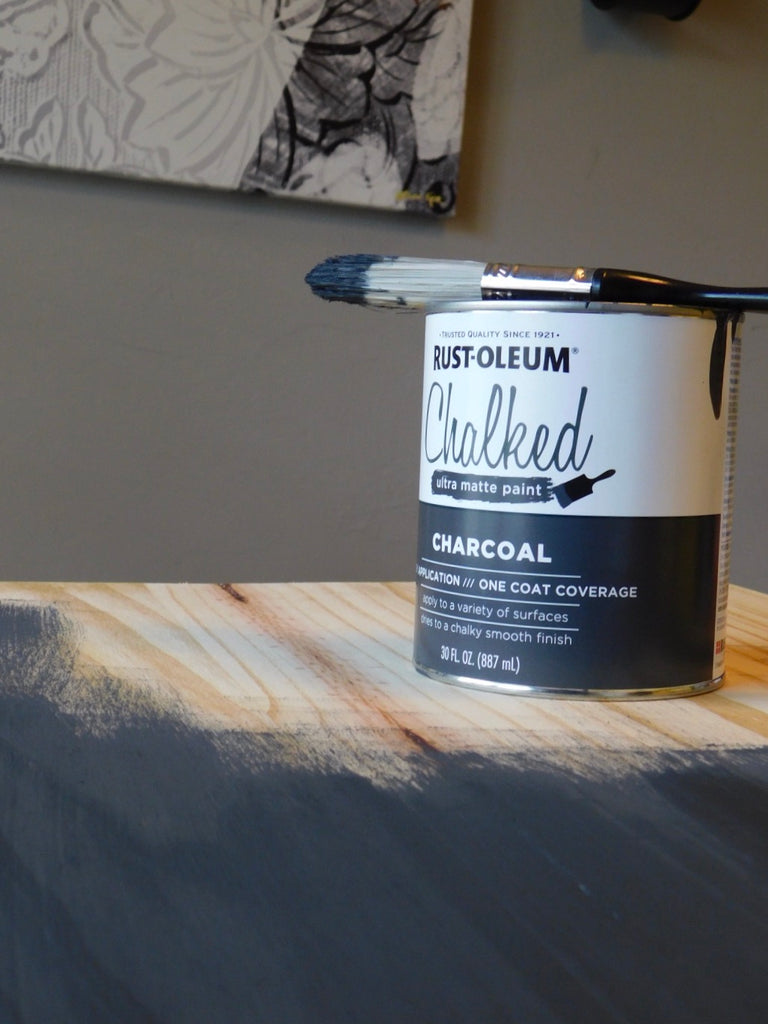
I am a huge fan of chalk paint and normally I use Annie Sloan but ever since I used Rustoleum chalk paint on my fireplace, I wanted to try it out on this build and I love it! Even better it's the third of the price of Annie Sloan! Sorry Annie! But Rustoleum is taking the win on this one! I'm excited to see how it holds up! I used the Rust-Oleum Charcoal for the under bottom and the Rust-Oleum Linen White
for the top. This was the perfect paint for a stencil because it dries so quickly. Idk if I would have enjoyed this project as much if I used regular paint.
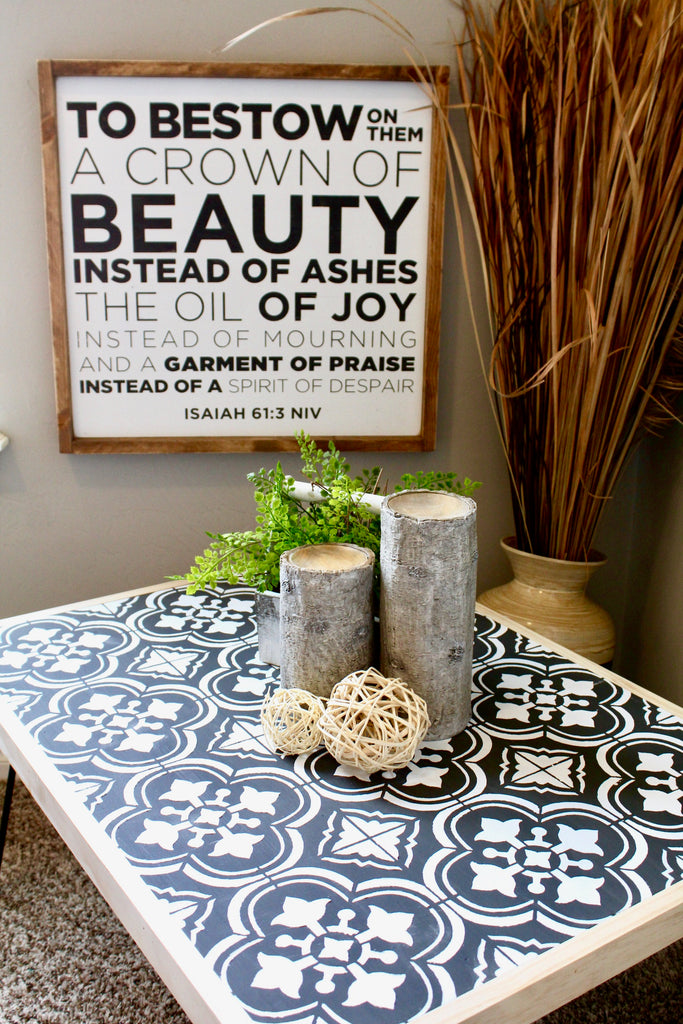
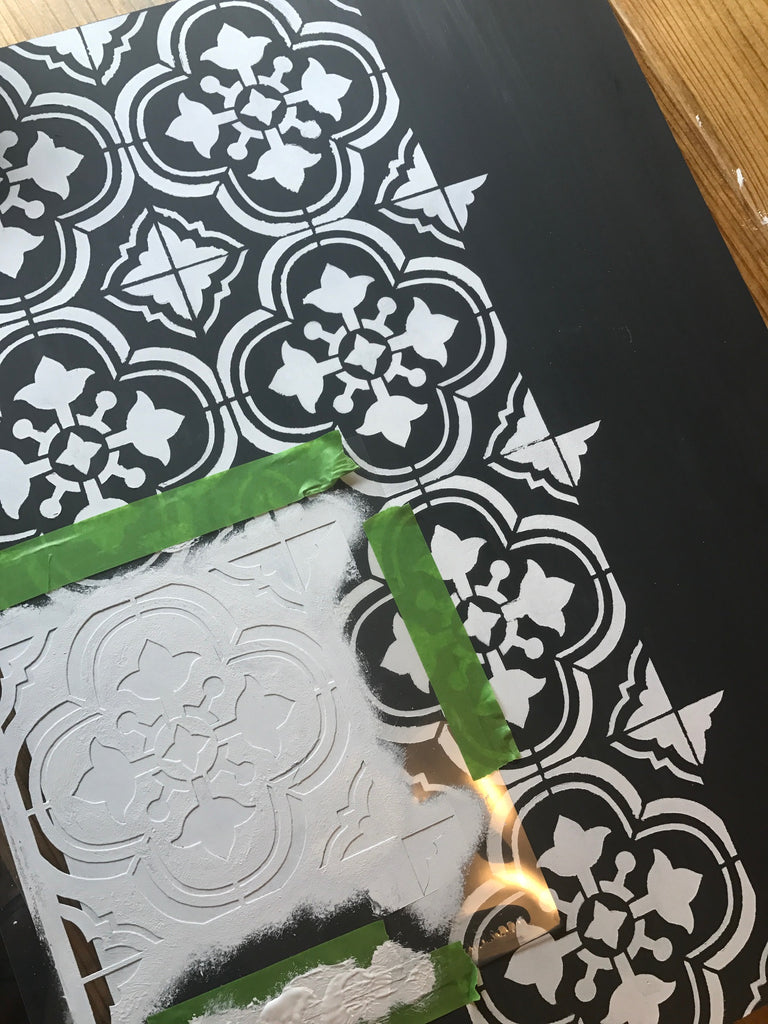
I have been seeing these Santa Ana Tile Stencil everywhere and since I couldn't use them for my floors, I thought what better to use them on then a piece of furniture! The best part was it was only $9.99! Nothing like a cheap stencil to make my day! I cut the wooden piece down so that I could fit the stencil on there 4 times. The stencil comes in two sizes so depending on the size you can decide the length you want. Mine was 24x36.
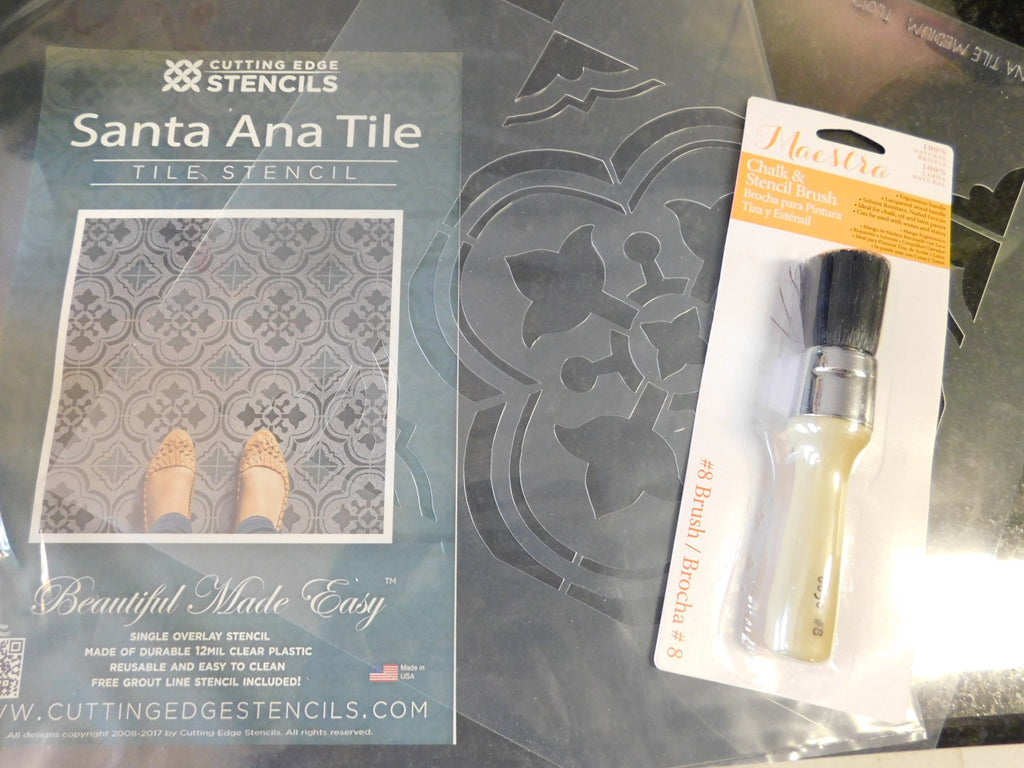
This was my first time using a stencil so I definitely learned some good tips for getting a clean finish. Rule # 1 don't put a blob of paint on the brush and expect to get clean lines. IT AINT GONE HAPPEN'.... I would suggest practicing on a scrap piece of wood first to get the hang of it, unless you want to be a brave soul like me and just thug it out. Either way, it wasn't that hard to do. I think a good brush is key, I picked mine up from my local Home Depot. Once I finished stenciling the table top I coated it with Rust-Oleum Clear.
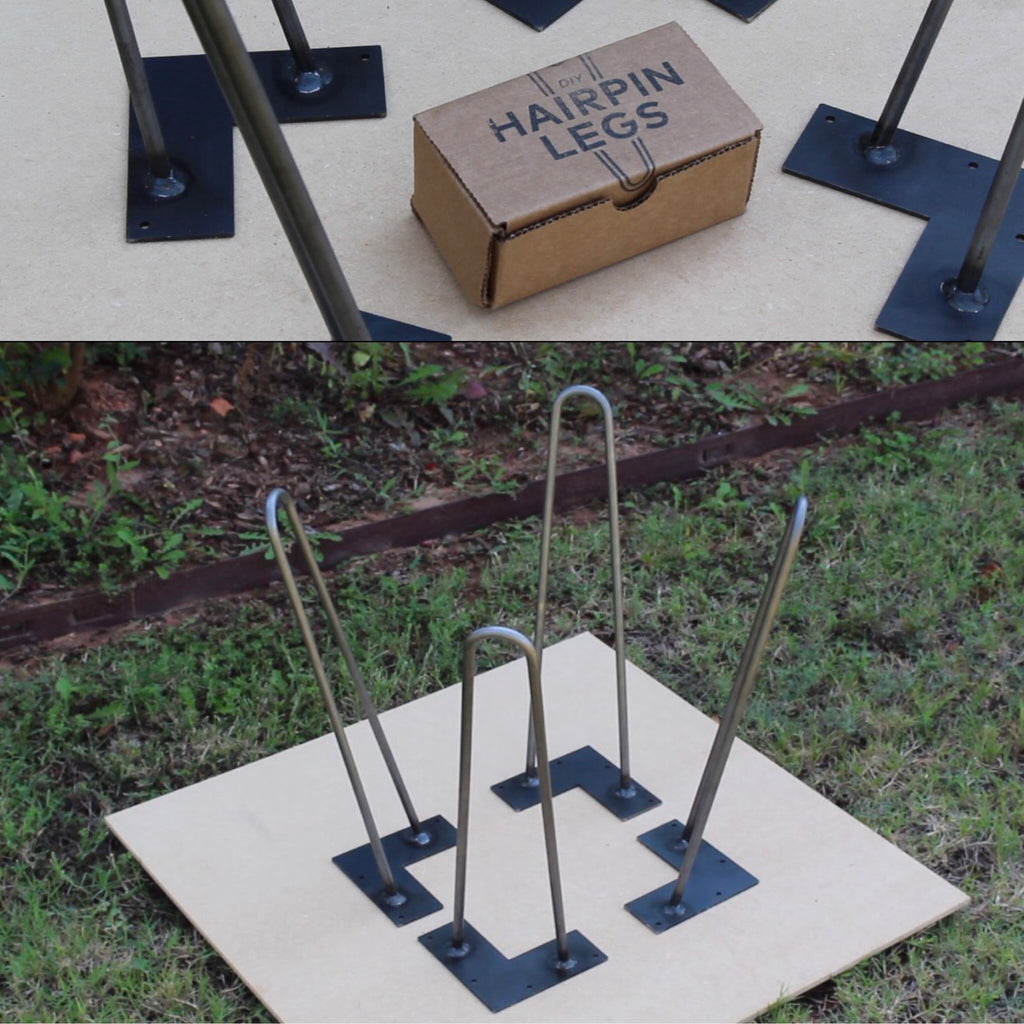
This was my first experience with hairpin legs, as well and I loved using them. They were super easy to incorporate into my DIY hairpin coffee table . Huge shoutout to DIY Hairpin Legs for sending these babies over! I loved that the legs came equipped with screws, I wasn't expecting that at all. It also came with full instructions on how to use them, even though its pretty straight forward. I used Rust-Oleum Flat Black and Rust-Oleum Matte Clear
on the hairpin legs and it really made them come to life.
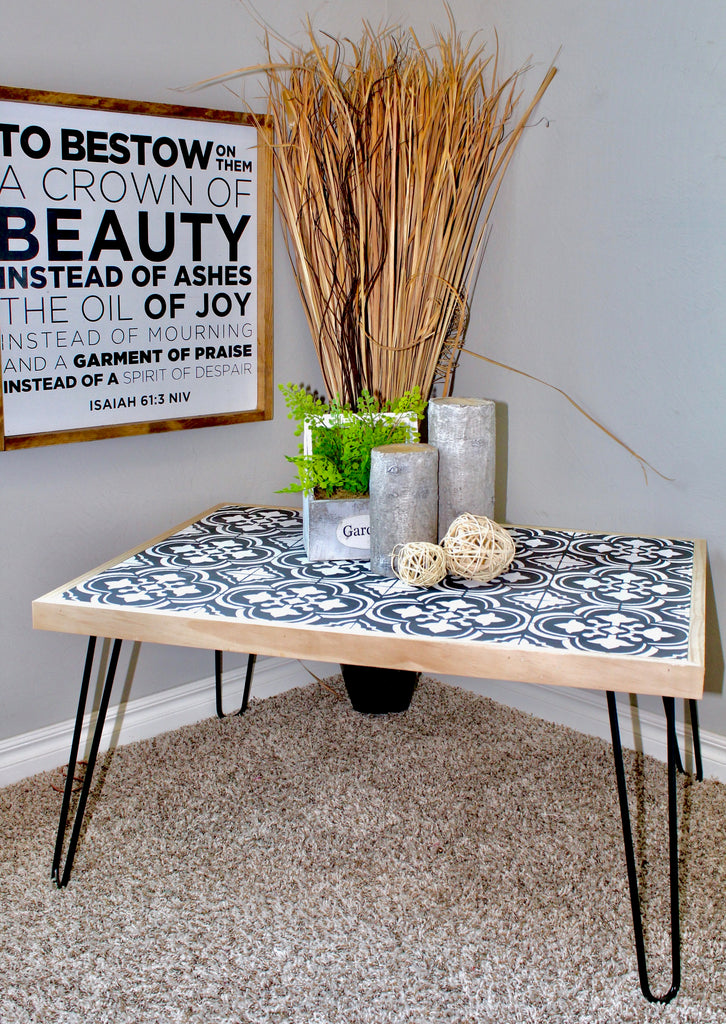
I am so happy with how this build came out. It was my first industrial type build and I couldn't be happier with the outcome. I think we need one last look!

I love that this DIY hairpin coffee table has such a modern feel to it and it only took one afternoon to get it finished! I would love to see your go at this modern hairpin coffee table.
"I received product for this post but all thoughts and opinions are my own."

DIY Barn Door Coffee Bar Center
A DIY Barn Door Coffee Bar never looked so good!
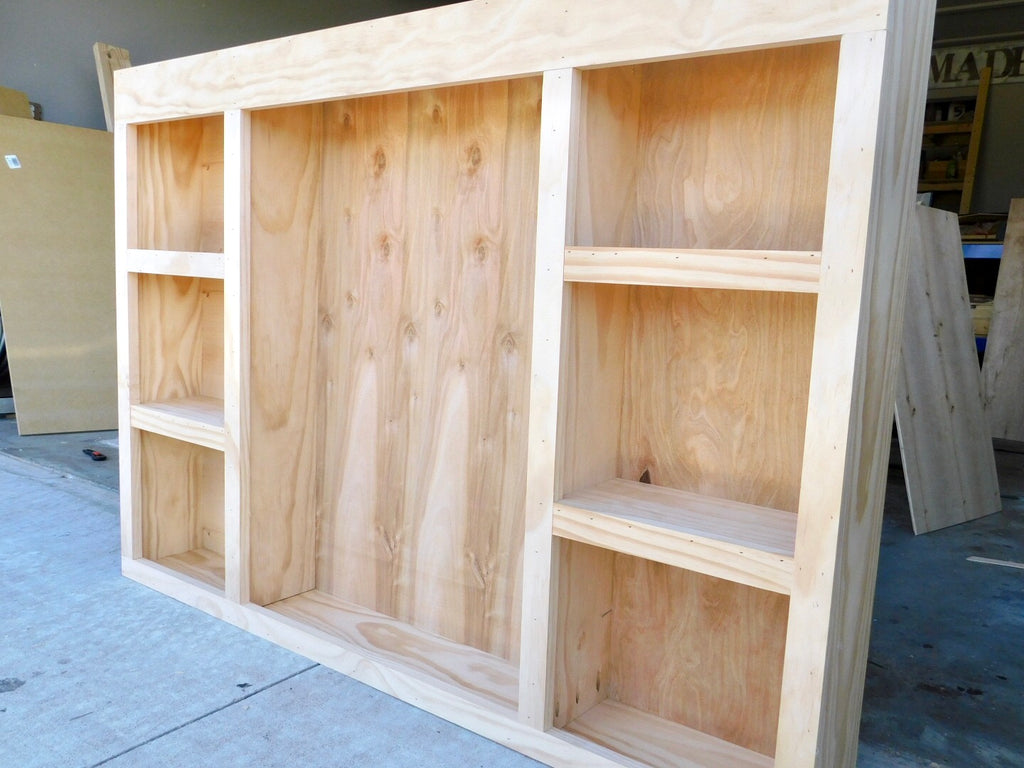
I've seen many DIY coffee bars but I wanted to switch things up a bit. A coffee bar with barn doors was the perfect idea. I have been dying to build some furniture with sliding barn doors and I'm so glad it was a SUCCESS. Even better, I have partnered up with my friends over at RYOBI Nation to give you the step by step tutorial. But first lets drool over this DIY barn door coffee bar.
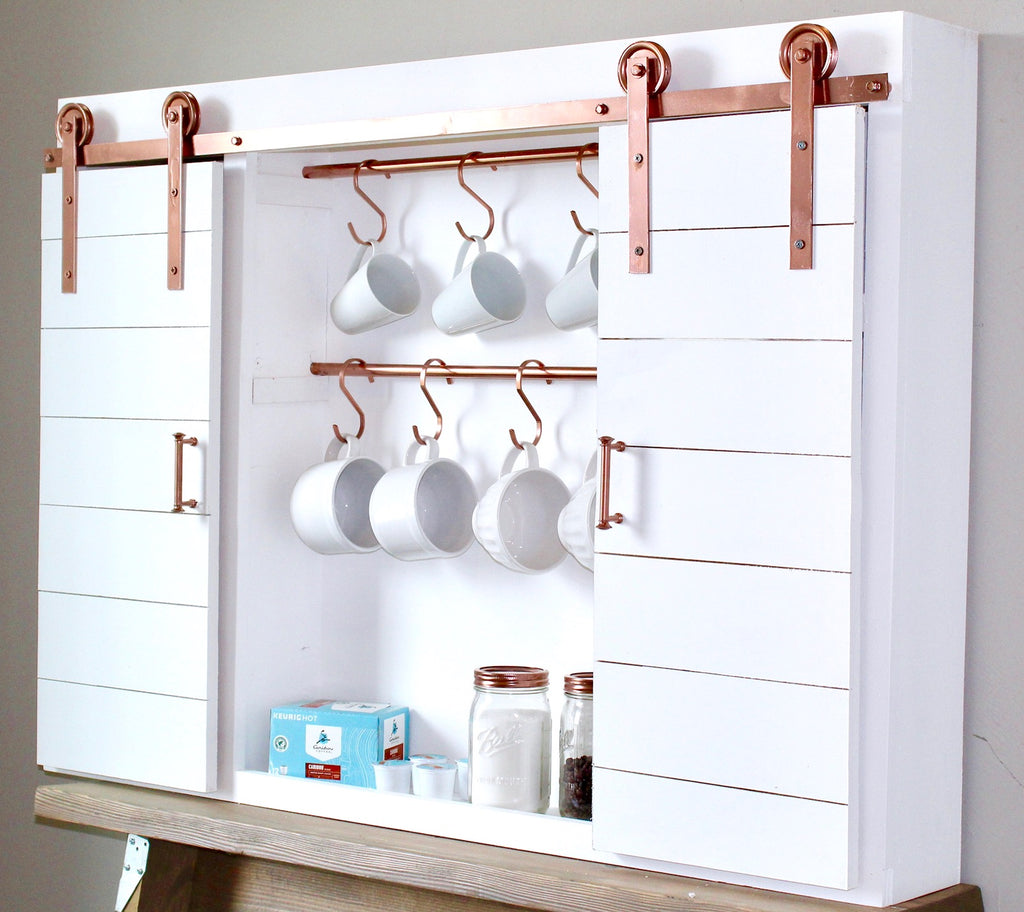
I was trying to come up with some different DIY coffee bar ideas and I must say my favorite part about this build is HANDS DOWN the metallic finish on the barn door hardware. I haven't seen hardware that comes in this finish, so I decided to create my own!
There are some affiliate links in this post, meaning I get a small commission if you purchase through these links, at no cost to you. Click Here to read my full disclosure.
 I used Rust-Oleum Copper
 and man does this hardware Shine. The copper pipes and the door pulls just brings it all together. But lets talk about this Rust-Oleum Comfort Grip
by RustOleum. Makes spray painting so much easier. Pops right on in seconds!

More and more I'm learning that I love hidden storage..and this diy barn door coffee bar center was no different! Behind the barn doors is plenty of storage room for all of my coffee supplies that I don't want everyone to necessarily see! I love making unique pieces for my home and this really makes my kitchen worth talking about!
Just a little inside scoop. I always use select pine from Home Depot when using pine wood. It's a little more expensive than regular pine but its so much better to work with and makes my builds a lot cleaner. I always have a struggle with wanting to paint or stain my furniture after I finish building it. It just looks so pretty the way it is.
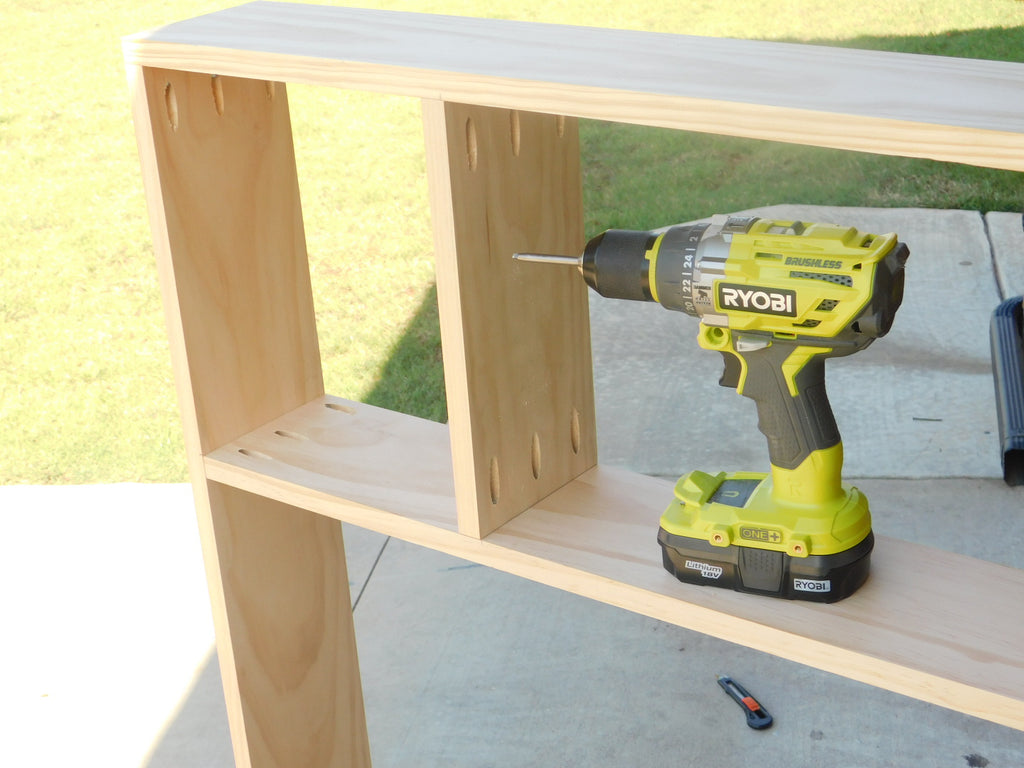
No build of mine happens without my beloved Kreg Jig K4 Pocket Hole System, but one of my other favorite tools is Ryobi's Hammer Drill. There aren't too many Ryobi tools I haven't tried and their hammer drill is definitely in my top 5. Check out my full tool review on the Ryobi 18V Hammer Drill here. These tools really brought this build together. Let's take one last look!

Now head on over to RYOBI NATION for the full tutorial for this DIY coffee bar! But one more thing before you go!

a Rafflecopter giveaway
*This post and giveaway is sponsored by Ryobi Power Tools. I have received product and compensation for this post but all opinions, thoughts and designs are my own.

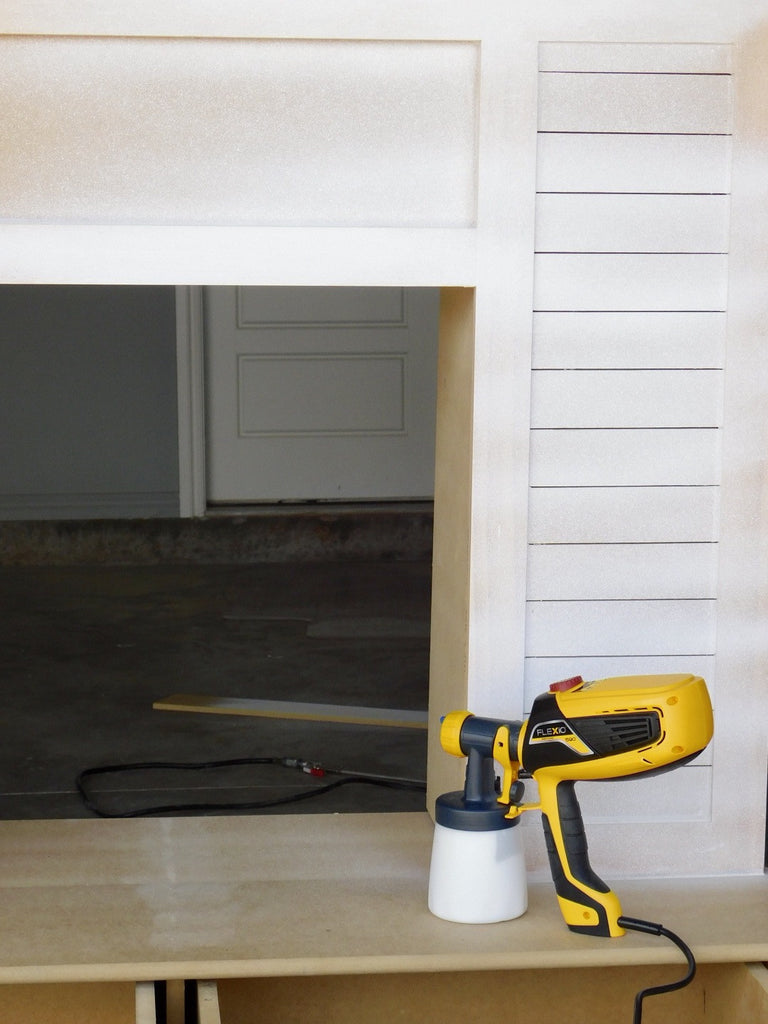
Faux Fireplace with Hidden Storage
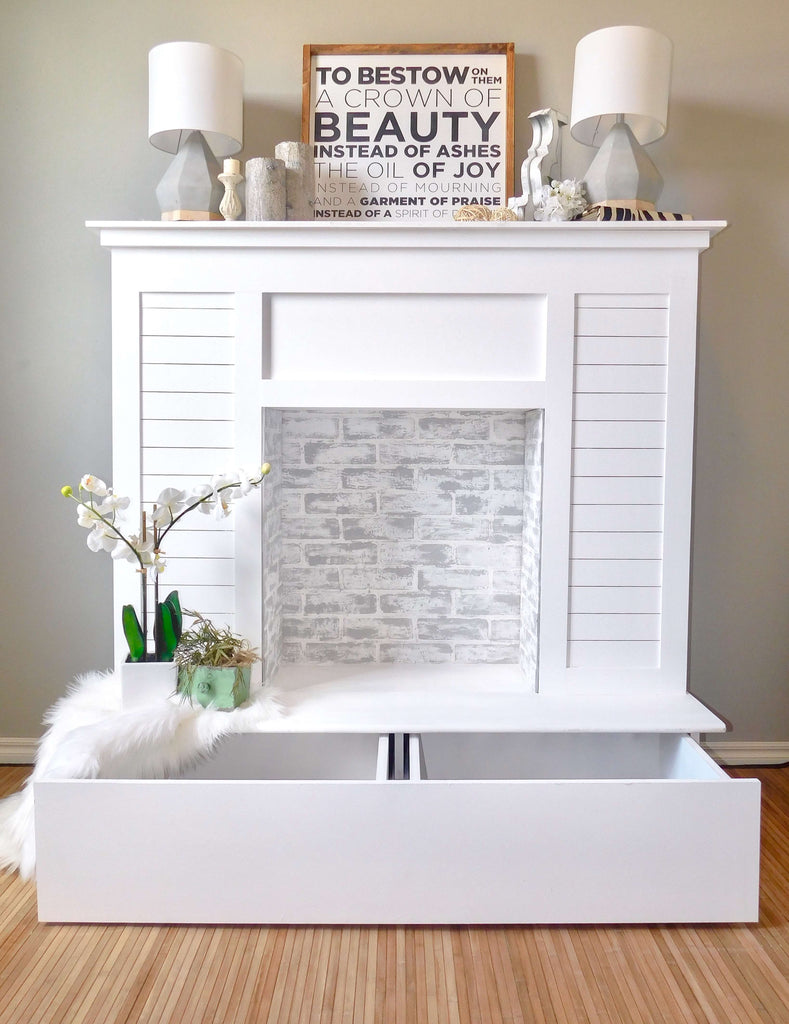
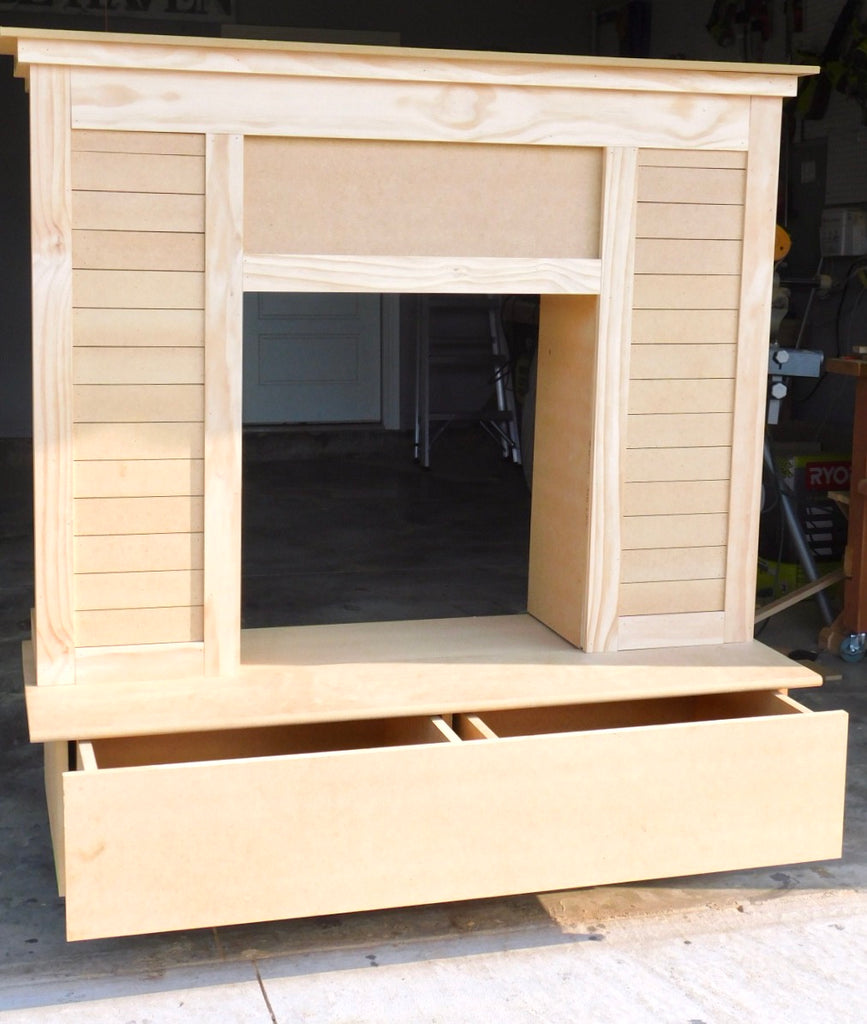
A Faux Fireplace with a touch of Shiplap, show me more!
I have always been a fan of a cozy fireplace, so this faux fireplace with storage was a no brainer. My home didn't come equipped with a fireplace so I thought; why not make my own? Luckily, my good friends over at Home Depot helped to make my faux fireplace come to life!
"This post is sponsored by The Home Depot. The Home Depot provided me with product and compensation. The opinions I have shared about the products are my own."

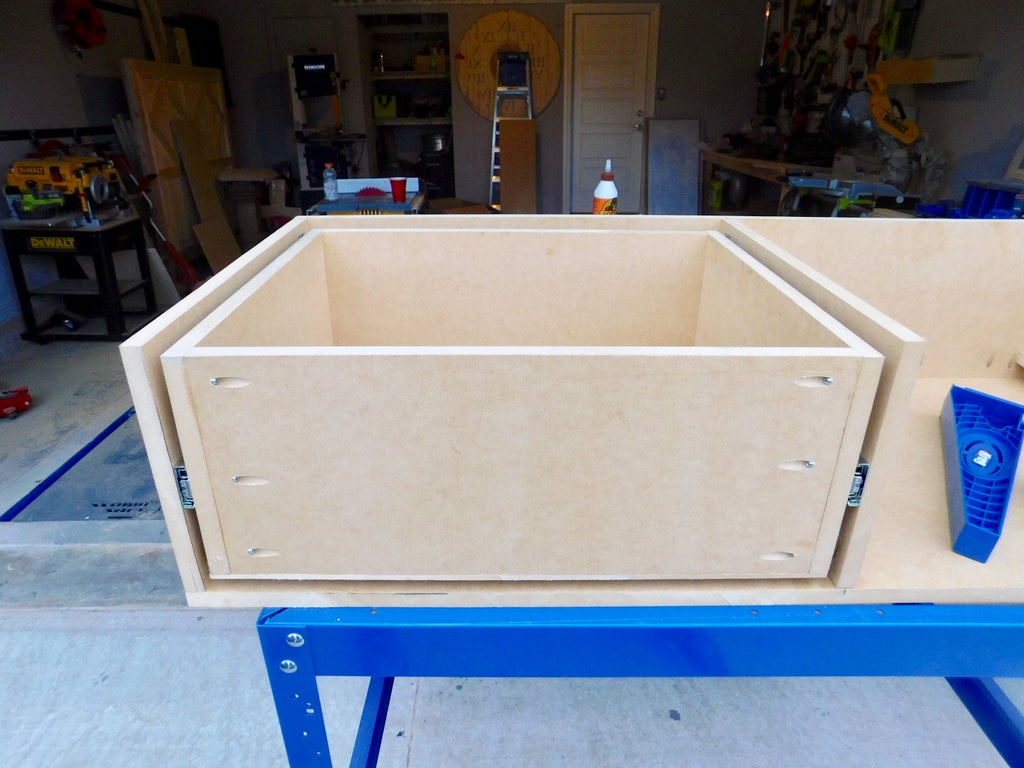

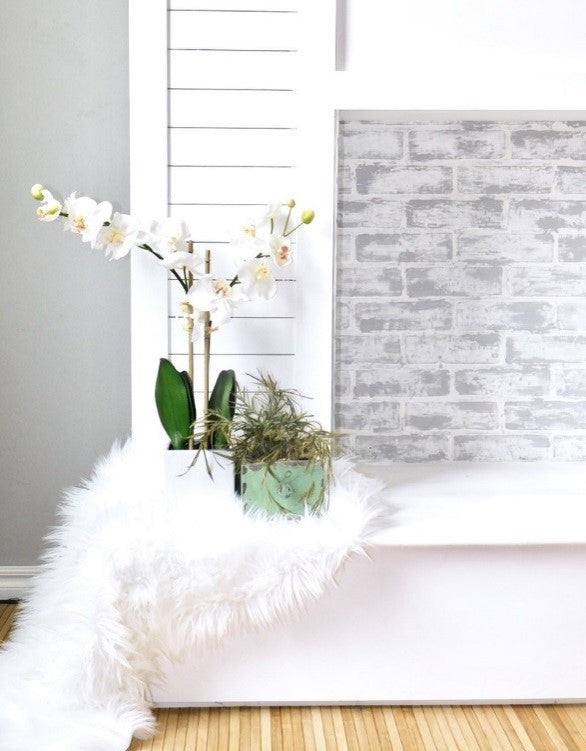
Now head on over to the Home Depot Blog to check out how I created this Faux Fireplace with storage.
Happy Building!

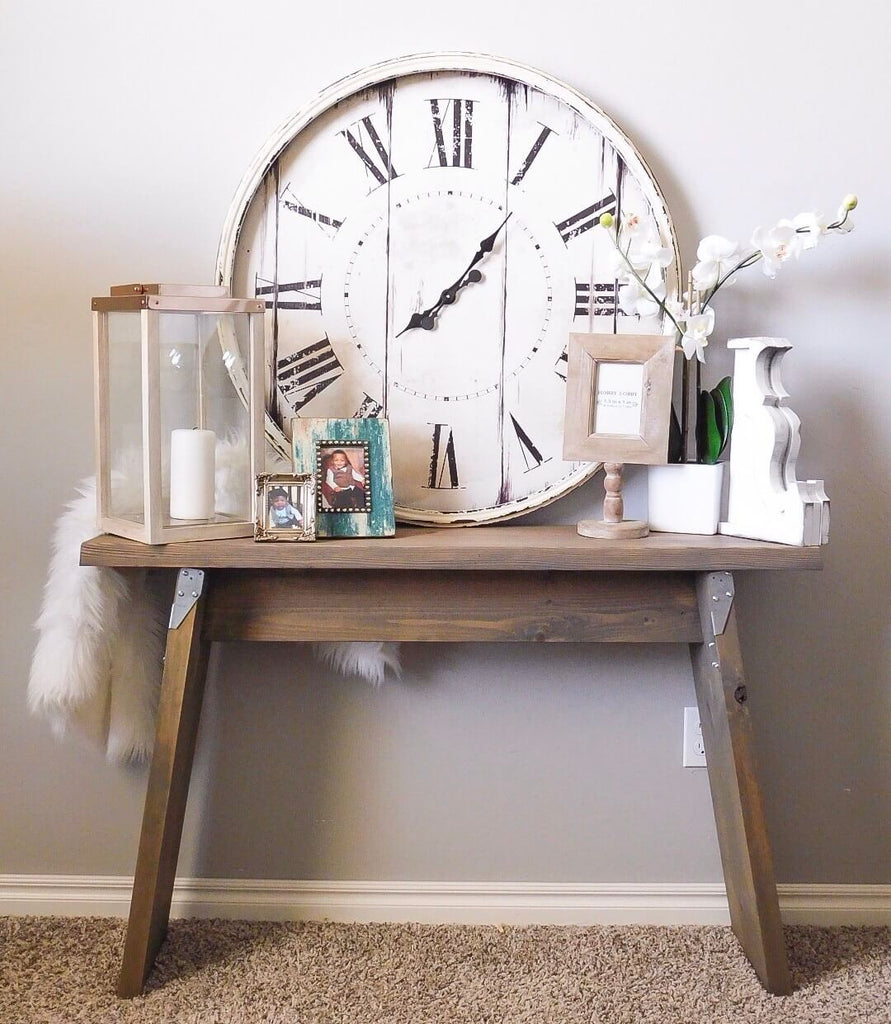
Industrial Console Table
This was a totally unexpected build, but I just love how it turned out! I had some left over boards from a project and saw a similar console on Pinterest and just had to re-enact it. Luckily it only took me about 30 min. to build. Doesn't get any better than that! Perfect for the beginner DIYer.
(There are some affiliate links in this post, meaning I get a small commission if you purchase through these links, at no cost to you. Click Here to read my full disclosure)
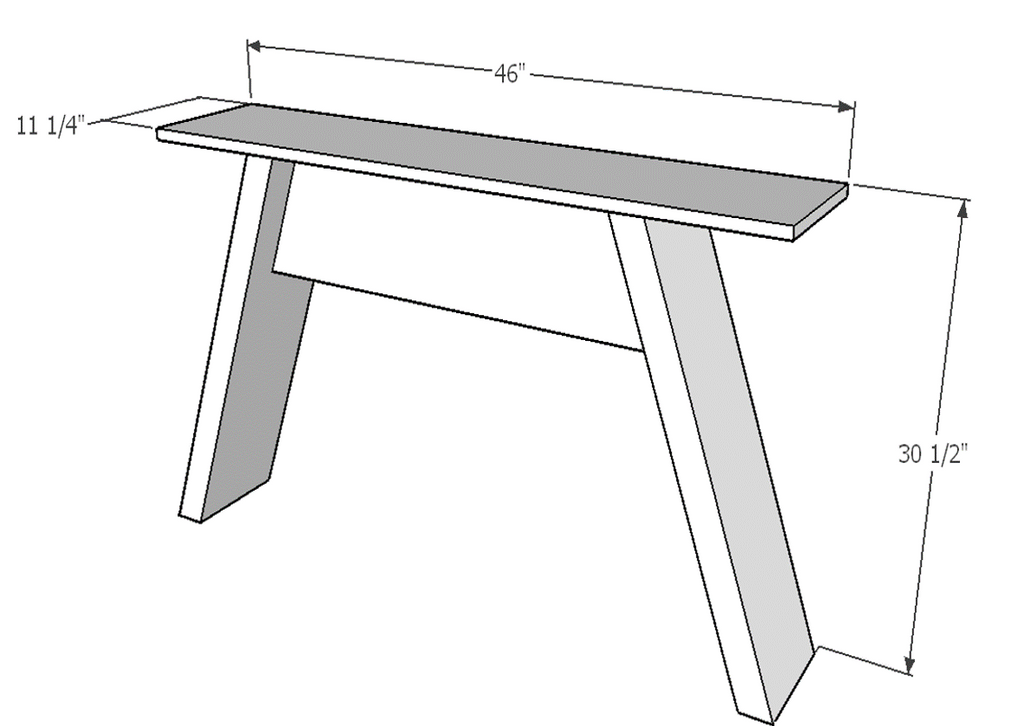
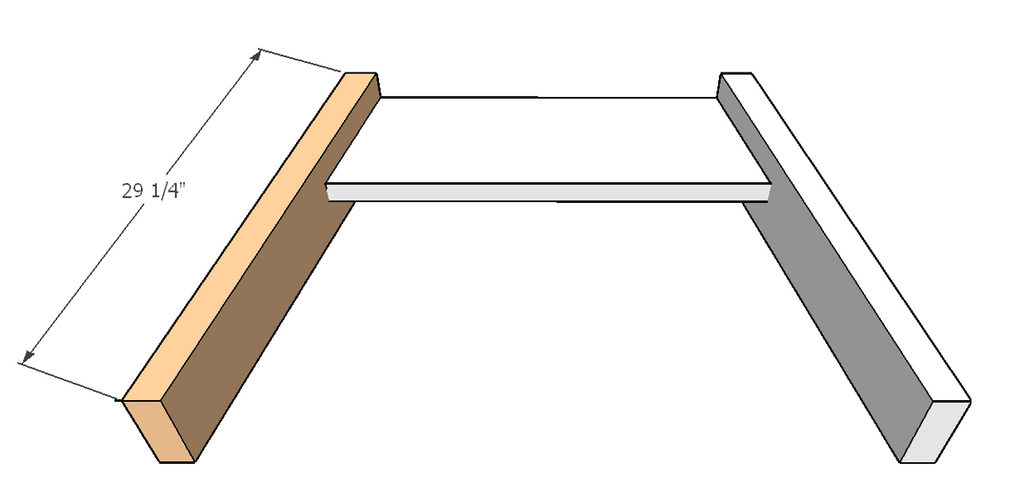
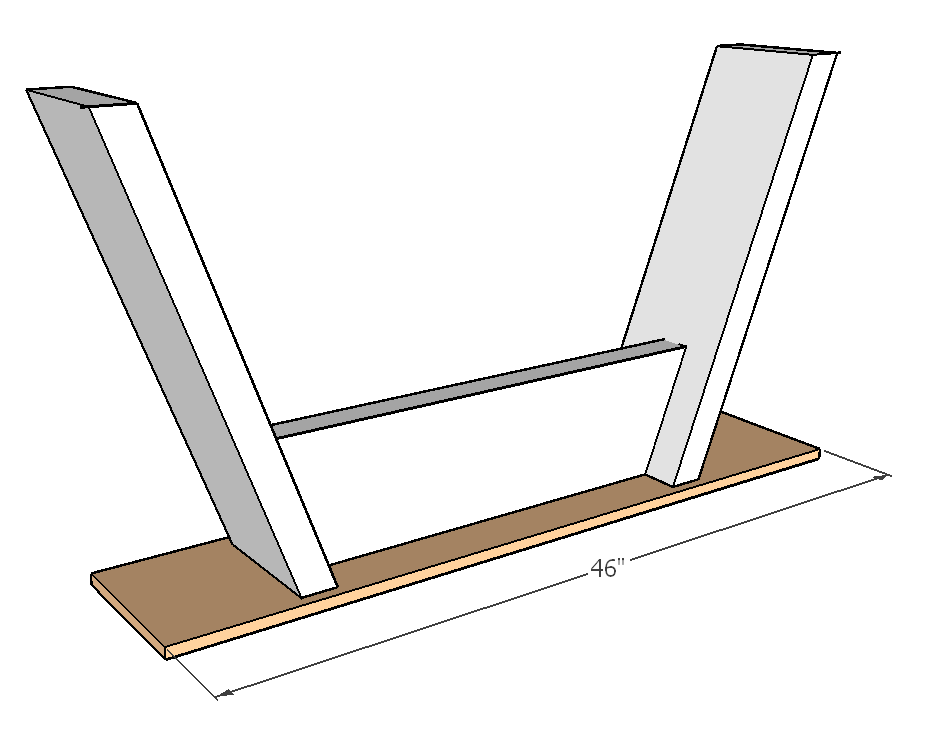
Dimensions
Materials List
1 - 2x10 @ 8ft
1- 2x6 @ 8ft
1- 2x12 @ 10ft
Cut List
2 - 2x10 @ 29 1/4" (10" angle on both sides) cut like a rhombus
1 - 2x6 @ 32 1/2" (10" angle on both sides) cut like a trapezoid
1 - 2x12 @ 46" (10" angle on both sides) cut like a trapezoid
Tools Used:
Kreg Jig K4 Pocket Hole System
Ryobi 18V Brushless Hammer Drill
Ryobi 15-Amp 10 in. Sliding Miter Saw
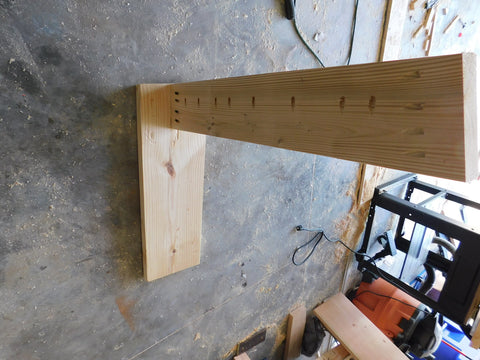
Step 1: Attach the middle 2x6 brace (32 1/2") to the side 2x10 (29 1/4") leg using a Kreg Jig K4 Pocket Hole System on a 1 1/2" setting, with 2 1/2" pocket hole screws to attach along with wood glue. The 2x6 should be flush with the top of the side leg and inset 3 3/4" from the front.
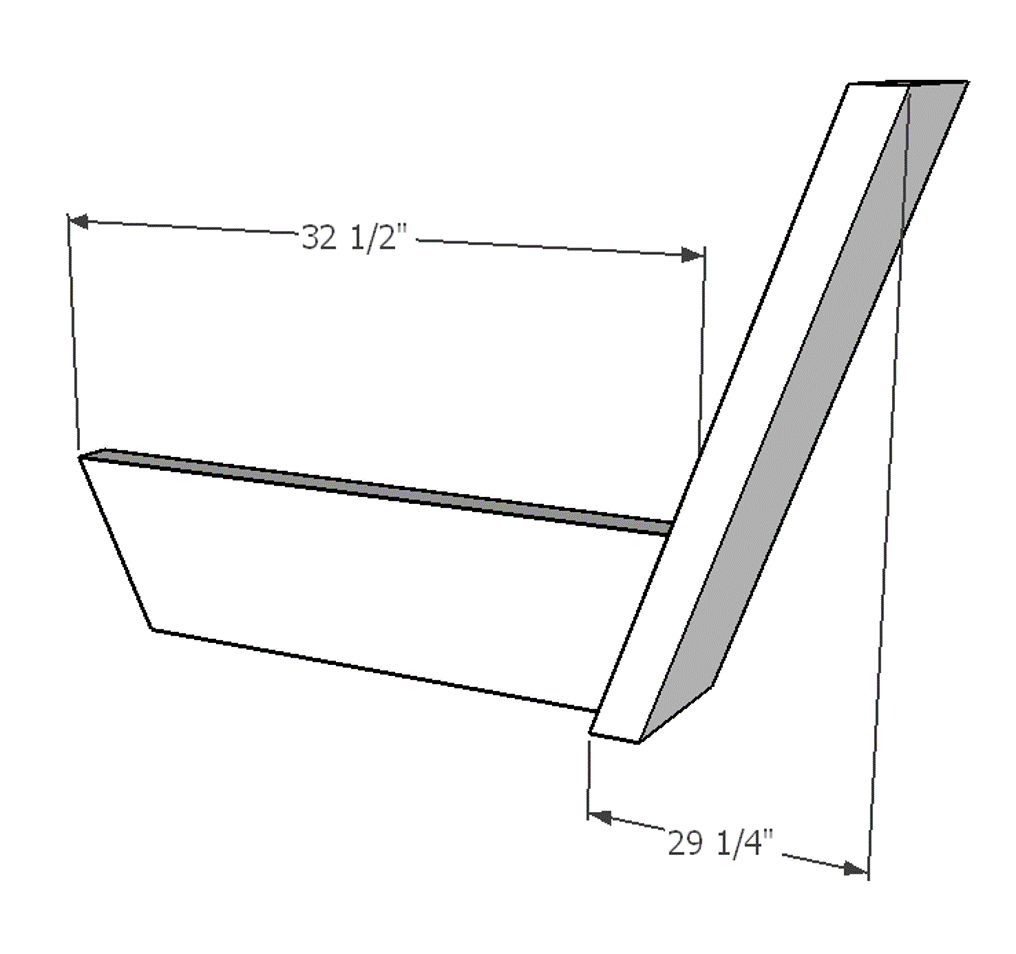
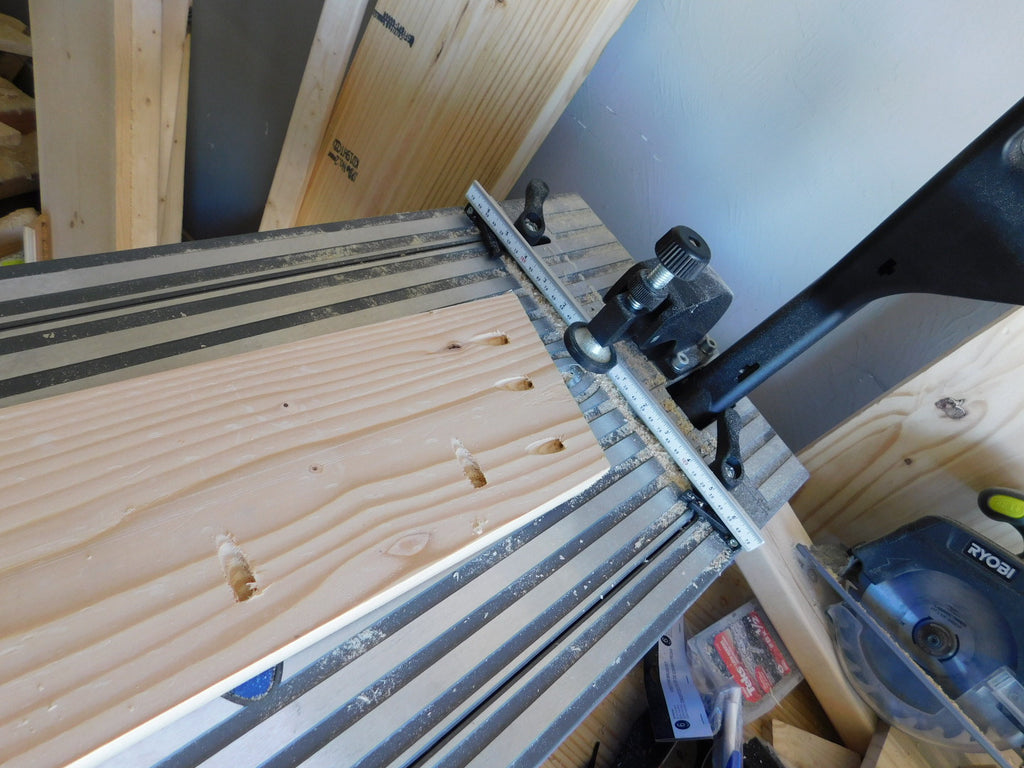
I used my Ryobi 15 Amp 12 in. Sliding Miter Saw with Laser to cut the middle 2x6 brace which will be cut at an angle of 10 degrees using the bottom miter scale. The side 2x10 leg will be cut at an angle of 10 degrees by tilting the blade to the desired angle.

 After cutting the wood I used my Kreg 3/4 HP Electric Foreman Pocket Hole Machine to make Kreg Holes in my 2x6 and 2x10 board. I put the fence setting in between 3/4" and 1 1/2". I'm not sure how that translates using a regular K4 machine, but I would think that using a 1 1/2" setting would be fine, but again I'm not sure.
I screwed 4 holes on the sides and 8 on the top for attaching the top later. I also put one pocket hole on the two side legs in the back for securing the top. (Picture Below)
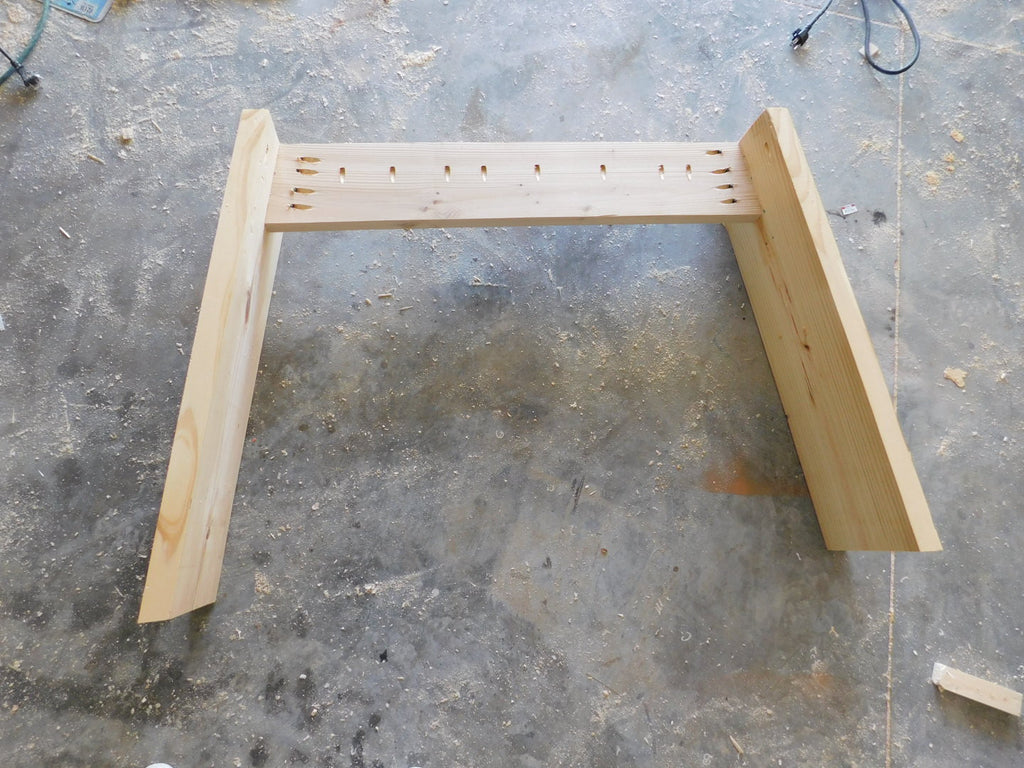
Step 2: Attach the other side 2x10 (29 1/4") leg using a Kreg Jig K4 Pocket Hole System on a 1 1/2" setting, with 2 1/2" pocket hole screws to attach along with wood glue. The 2x6 should be flush with the top of the side leg and inset 3 3/4" from the front.
Step 3: Attach the console table top 2x12 (46") using the pre-drilled pocket holes and 2 1/2" pocket hole screws to attach along with wood glue. I placed my top so that it hangs 1 1/2" from the base. Table top angles will be cut by the tilting the blade.

and ladies and gentlemen! Your done! Time for a finish and some hardware.
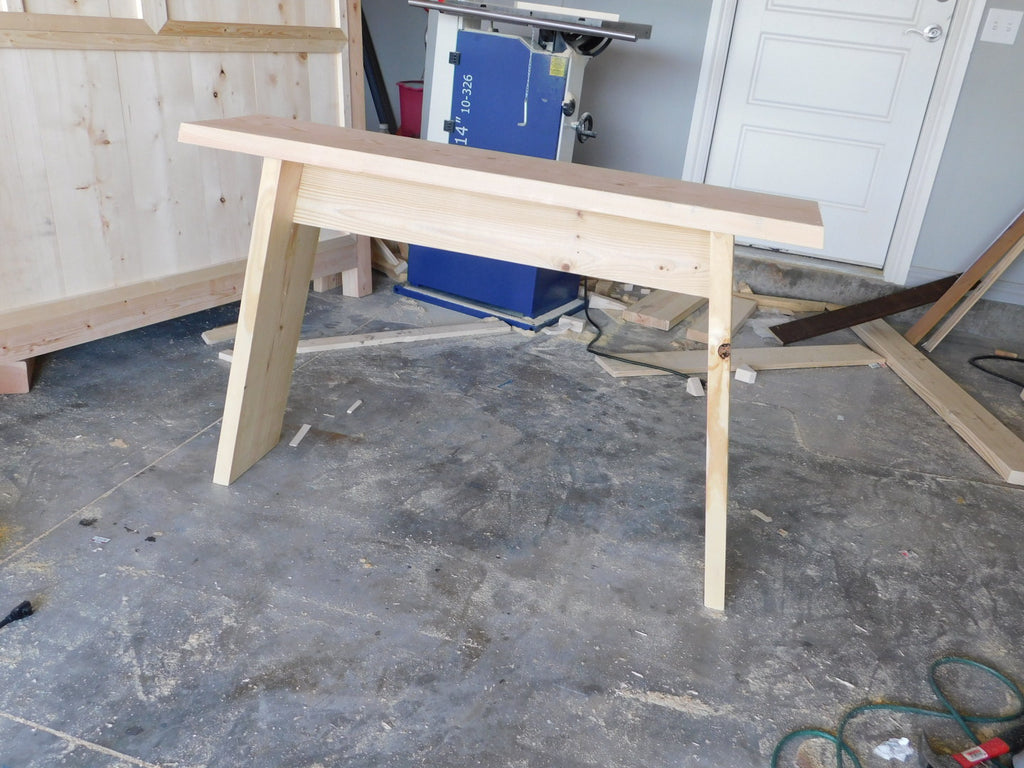
I have been seeing a couple people use Rust-Oleum's Varathane 1 qt. 3X Briarsmoke Premium Wood Stain and I have been dying to get my hands on it! I really love this color.
Once I finished staining the console I added these industrial pieces I had laying around, I believe I got them from Lowes. Be creative!
Lets check it out again!