
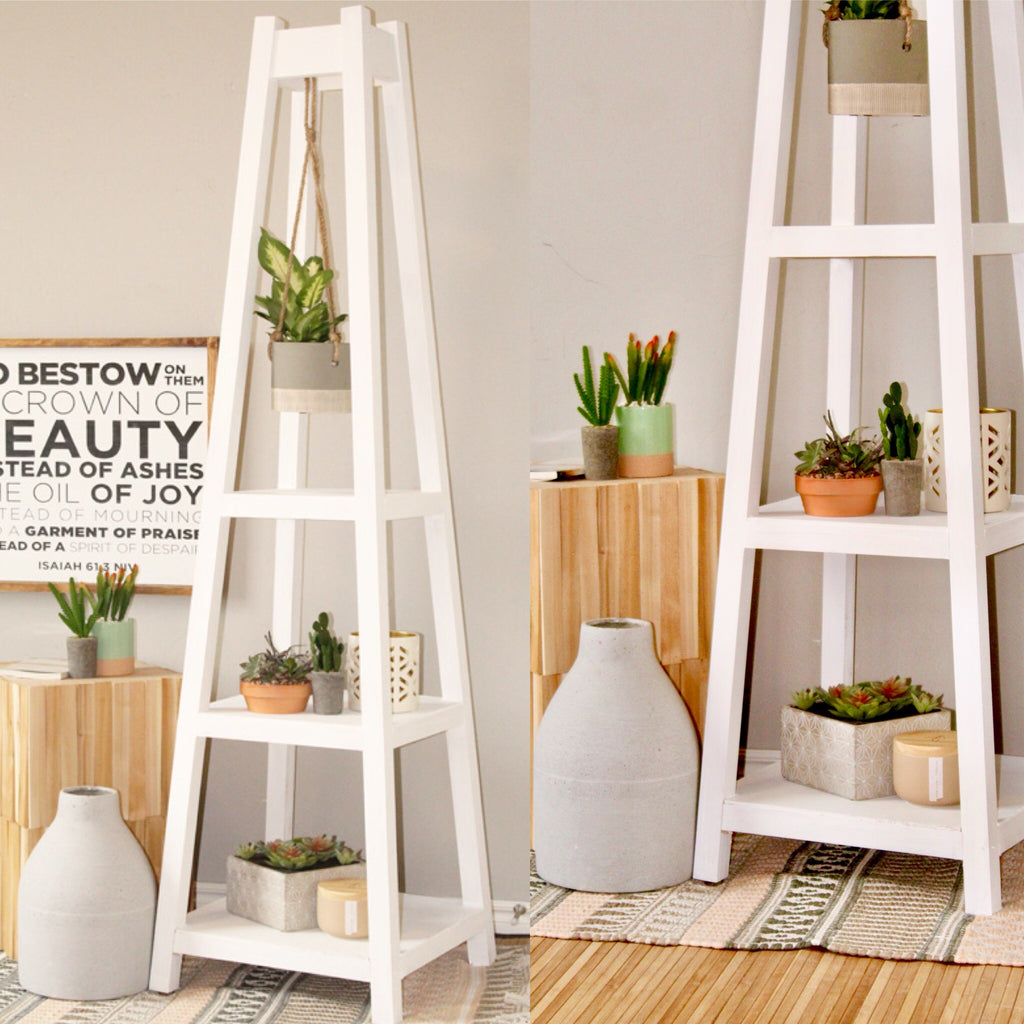
A DIY plant stand on a whole new level.

Both tools are part of the DEWALT 20-Volt Max system and are compatible with all 20-Volt Max batteries, chargers and accessories and the kit is backed by a DEWALT 3-year limited warranty The combo kit comes packed with the DEWALT Impact Drill and Driver, two DEWALT batteries, a battery charger and a carrying bag; sounds like a steal to me.
I also really like using this DEWALT 20 Compartment Organizer. I have a hard time staying organized without tools like this, so I'm glad to have this organizer in my shop. I really like the removable dividers and the added carry handle. Additionally, the latches on the side enables stacking to other DEWALT units and for the price you can't beat it.
Hopefully you guys enjoy watching me build this cool plant stand and be sure to check out the plans below!
Tools Used:
Materials:
Cut List:
Step 1: Cut the bottom of the four (6ft) 2x2s at a 5 degree angle using a 12” Ridgid Sliding Miter Saw
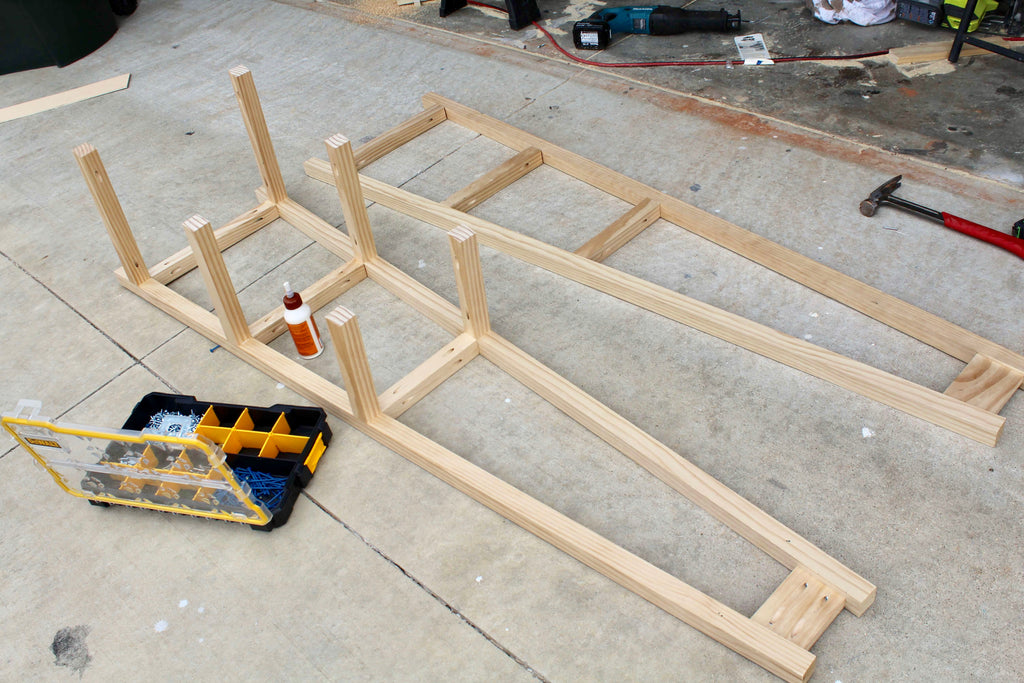
Step 2: Attach the bottom, middle and top slate to the two 2x2 slides using a Kreg Jig on a 1 1/2" setting, with 2 1/2" pocket hole screws to attach along with wood glue.. Repeat step for the other side of the DIY plant stand. Repeat this step for the other side of the plant stand. Note: Slates should be cut at a 5 degree angle.
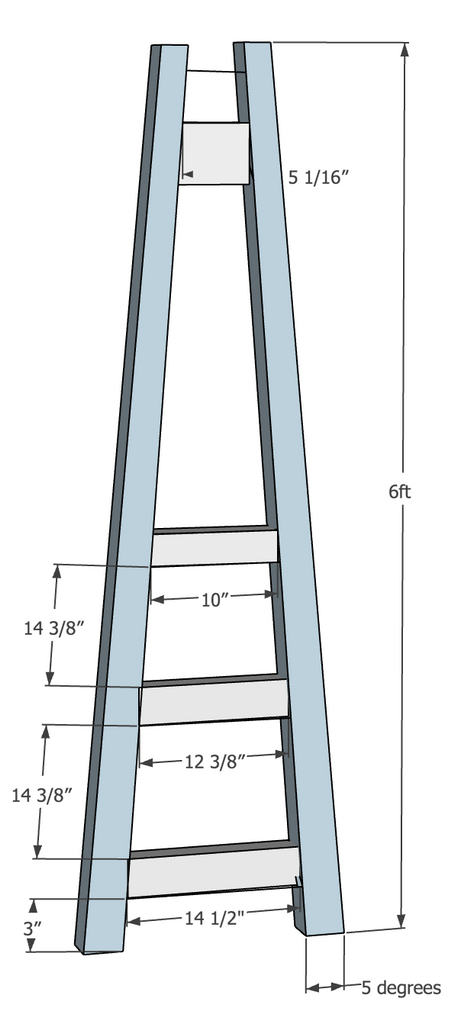
Step 3: Attach the top (5 1/16") 2x2 top piece to the 2x2 sides using a Kreg Jig on a 1 1/2" setting, with 2 1/2" pocket hole screws to attach along with wood glue.. Repeat step for the other side of the DIY plant stand. Repeat this step for the other side of the plant stand. Note: Top piece should be cut at a 3 degree angle.
 Step 4: Attach the (14 1/2") bottom, (12 3/8") middle and (10") top 2x2 side connectors using a Kreg Jig on a 1 1/2" setting, with 2 1/2" pocket hole screws to attach along with wood glue.. Then attach the last two (5 1/2") top pieces to finish up the DIY plant stand frame. Note: Connector side connectors should be cut a 5 degree angle.
 Step 5: Using a Bandsaw cut out the notches on the plywood shelving, and add the shelves to the plant stand using wood glue, a brad nailer, and brad nails. I had to cut the shelving in half in order to fit it into the plant stand frame. If you use wood filler to fill in the crack you will barely be able to notice that the shelving top is cut in two.
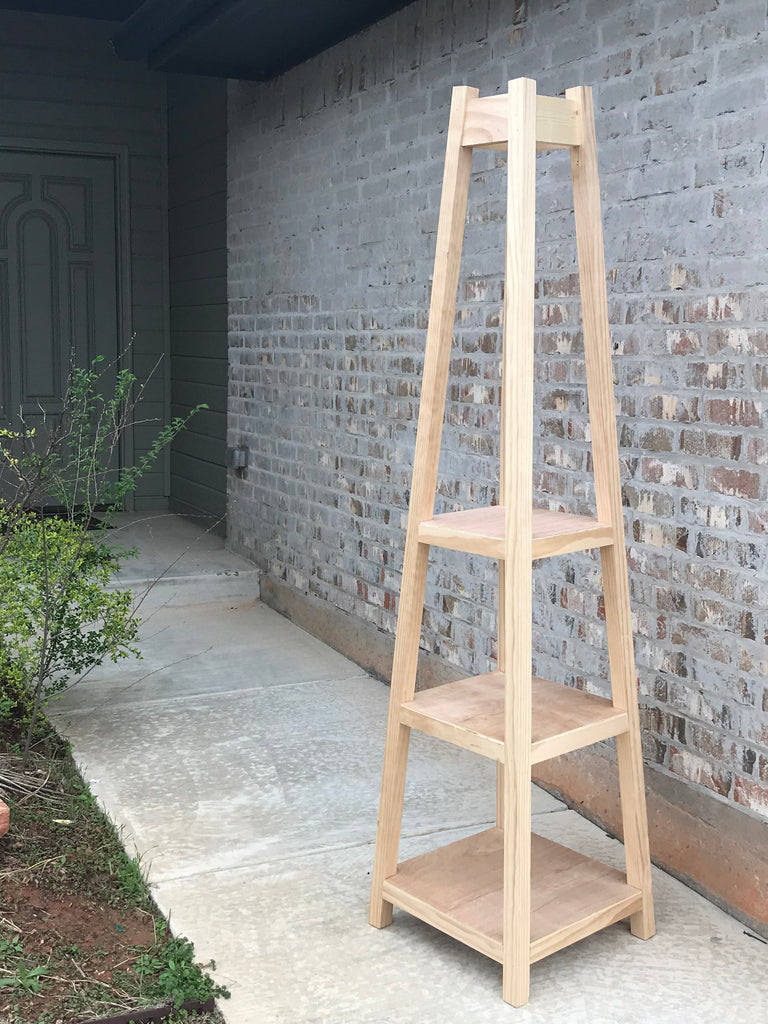 I loved how simple this planter was, and love even more how it turned out. This was the perfect weekend project and I think I may have to build me a couple more. Just a little secret this DIY plant stand was initially supposed to be a coat rack but after some feedback on Instagram, the project got changed.
 I love that this project was originally meant for something else but evolved into something else. HA, a day in the life of Ashley.

and even better I added some hooks later on to turn it into a DIY coat rack! Check it out here.


Thanks for reading guys! XOXO Ashley
I acknowledge that the Home Depot is partnering with me to participate in the The Home Depot Pro-Spective Campaign. As a part of the program, I am receiving compensation in the form of products and services, for the purposes of promoting The Home Depot. All expressed opinions and experiences are my own. My post complies with the Word of Mouth Marketing Association (WOMMA) Ethics Code and applicable Federal Trade Commission guidelines.


