
Who knew Tile could look so good with peel and stick.
There are some affiliate links in this post, meaning I get a small commission if you purchase through these links, at no cost to you. Click Here to read my full disclosure.
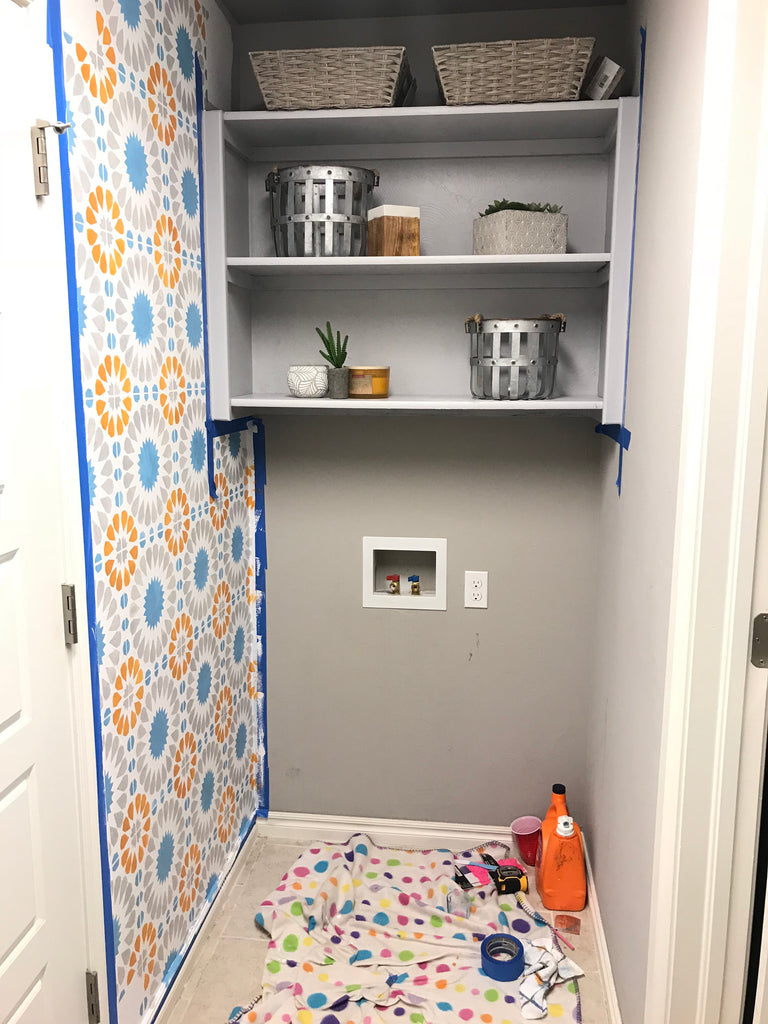
Originally, I was thinking about doing regular tile, but I was a little hesitant because my time limit on trying to get this finished up was pretty short. As I was looking at some tile at The Home Depot, I discovered this Peel and Stick Tile and I knew immediately that's what I wanted to use.
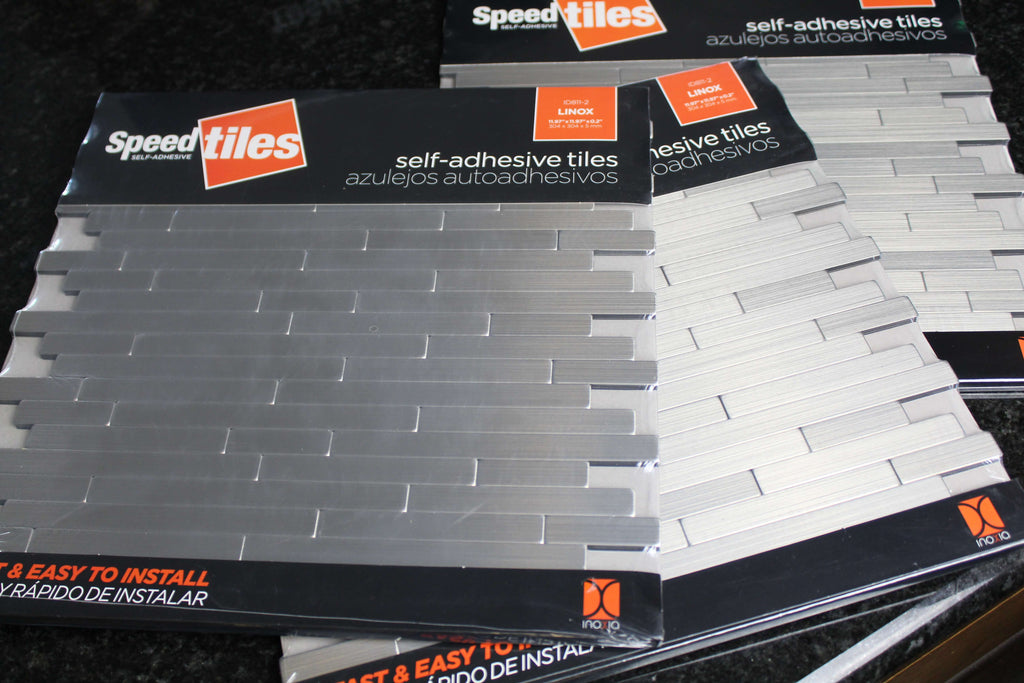
They had four options to choose from in the store but it was clear that this Linox Peel and Stick tile was made for my project and I was so glad I found it because I knew it would be way quicker than trying to hassle with real tile.
Check out this installation video below to see a quick overview of how I installed this peel and stick tile.
Materials Used
- Outlet Cover
Tools Used
- Square Block
- Bandsaw
- Screwdriver
Step 1: Remove Backing from Peel and Stick Tile
Before applying the speed tiles to the wall, I first removed all of the plastic from the tiles. Be sure not to remove the white sticky backing until you're ready to place the tile on the wall.
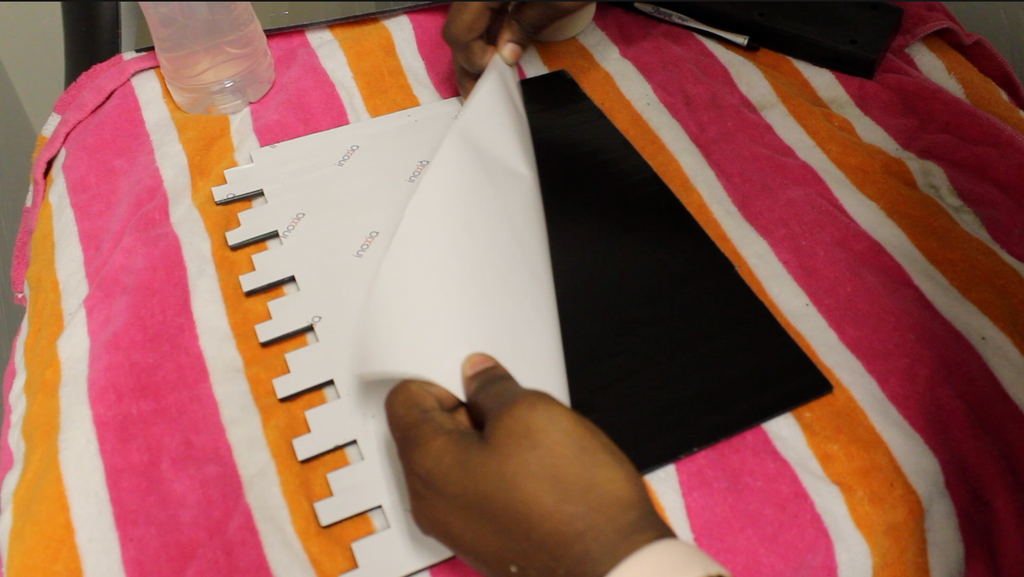
Once you are ready to begin, one by one remove the sticky back from the Linox Speed Tile.
Step 2: Add soap water to peel and stick tile
Once I was ready to apply the peel and stick tile to the wall, I applied some soapy water to the back of the tile. The soap water is used to help move the tile while applying it to the wall. This step definitely helped me a lot because I had to maneuver some of the tiles after sticking it to the wall.
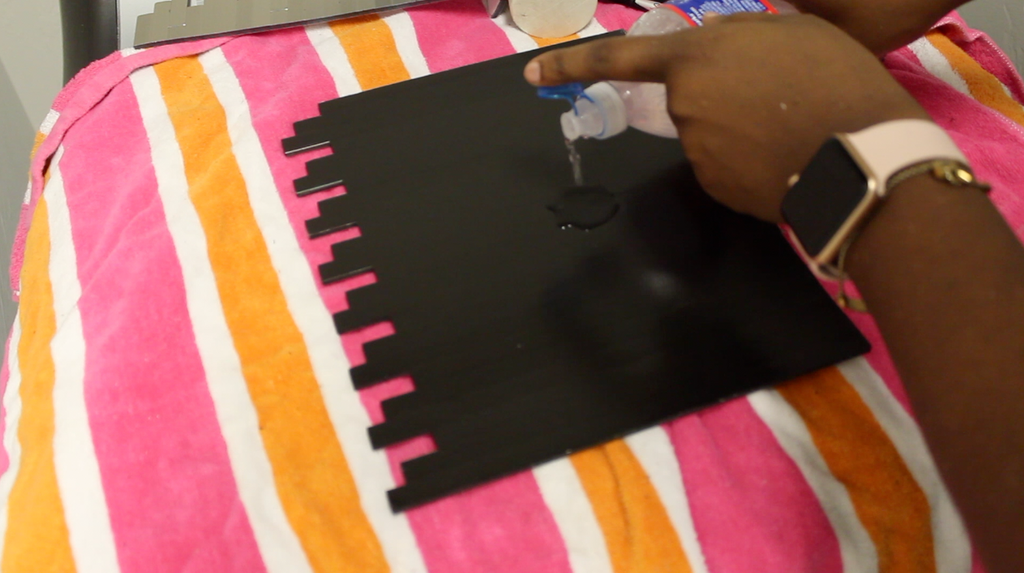
You don't have to put a whole lot of water on the back, just enough to where the whole tile is covered. I used a bottle of water and dropped two tablespoons of dishwashing soap and that worked great for me.
Step 3: Apply to Wall
After adding the water to the tile, you want to place the tile on the wall right after. The water dries pretty quickly once it's on the wall, so don't be slow to apply.
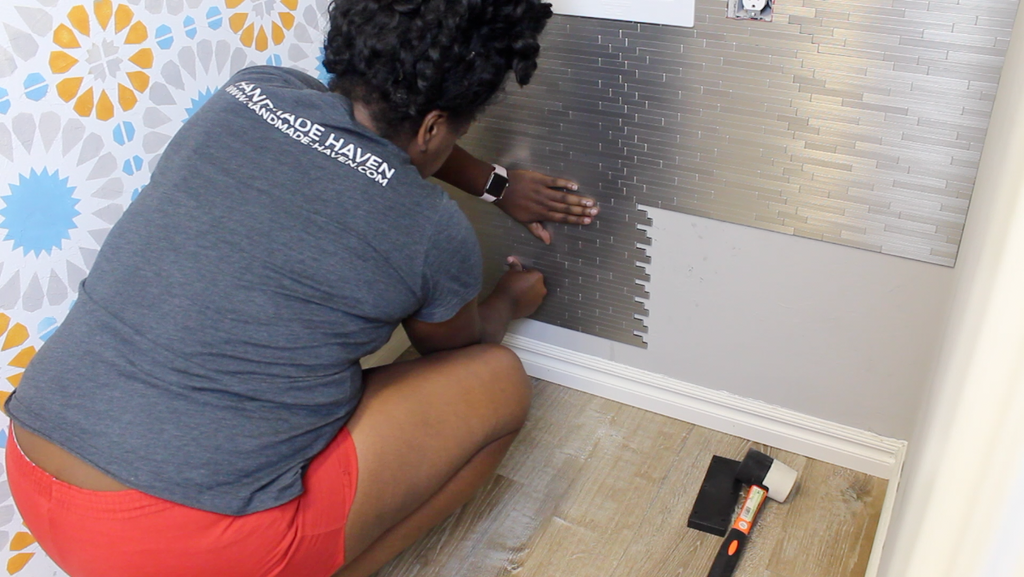
I started from the top and worked my way down. The most important thing to remember is to make sure you start your tiles even. If you don't, your tiles will not line up evenly and you will have trouble aligning your tiles.
I did actually mess up two tiles and had to pry them from the wall. I was able to get them off but these tiles really stick to the wall good. Some of the drywall came off with it, but fortunately I was able to take the misaligned one off and replace it with another.
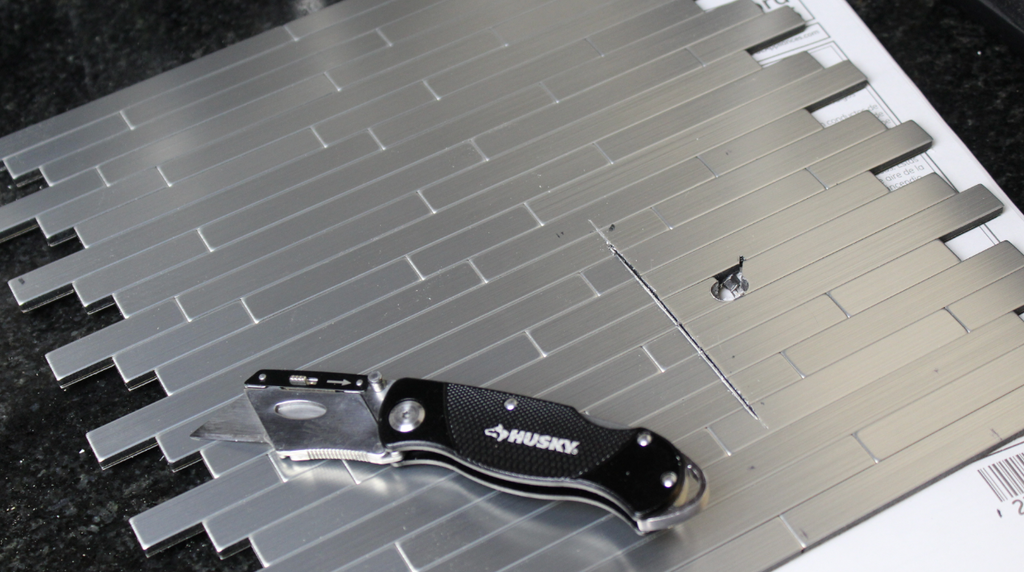
To cut around the outlets, I used my Husky Utility Knife to cut a square out of the tile. I did attempt to use a jigsaw because the utility knife was tedious, but because of the weight of the tile, the jigsaw was breaking off more than I needed to cut.
Once I got the outlet all cut out, I added Outlet Spacers for the outlet so that the outlet cover could go over top of the speed tiles. I was a little worried how the tiles would look without removing the baseboards, but it turned out great without removing them, so if that's a concern, no worries!
I would love to show you more photos, but it gives so much of the laundry room away all ready! So you'lle just have to wait for the big reveal!
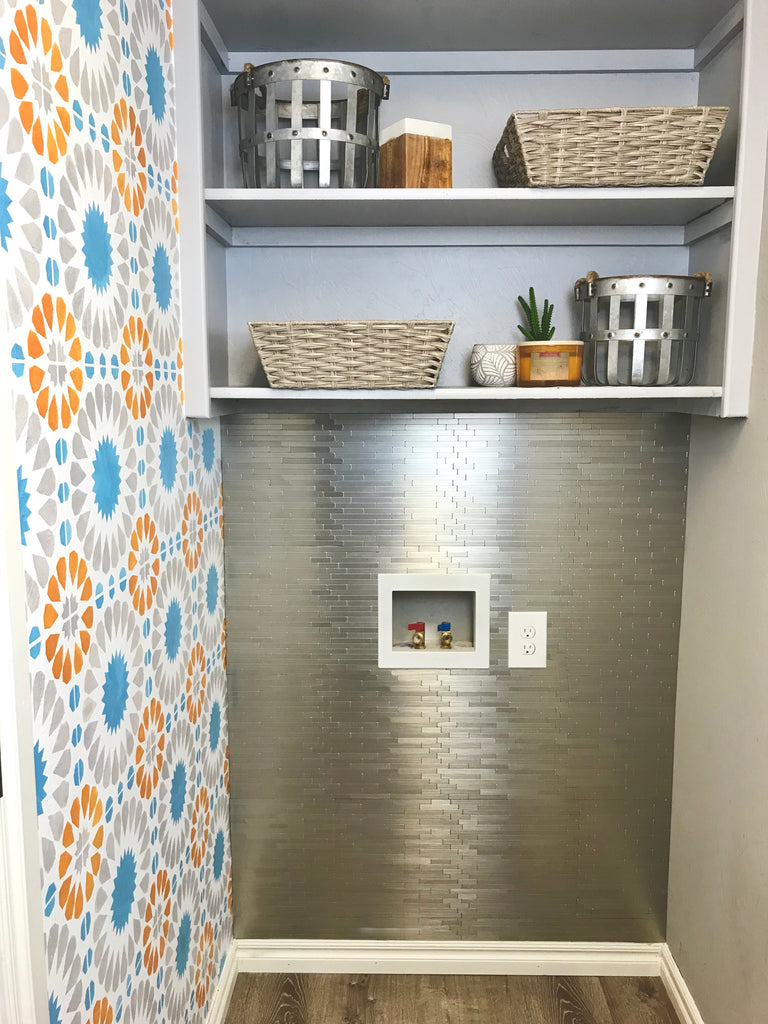
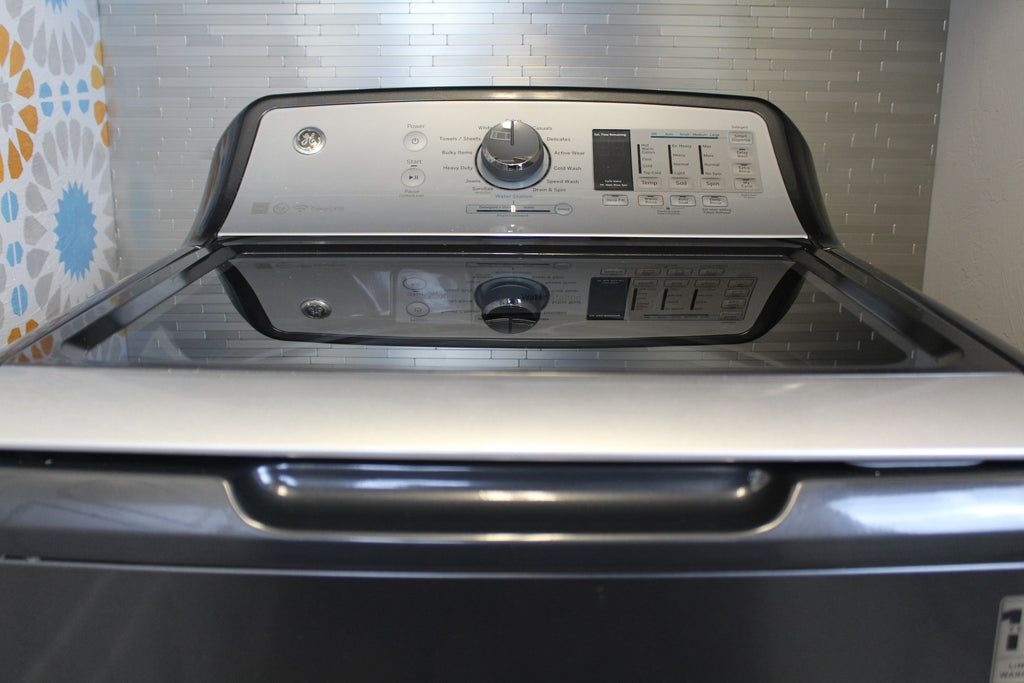
I really love how the peel and stick tile looks up against my new washer and dryer I received from my friends over at the Home Depot. It really makes the chrome finish pop.
Be sure to check out the final reveal here!
Thanks for reading, XOXO Ashley.


